55 Foods from the Farm:
Tourtiere with a homemade crust

55 Foods from the Farm:
Tourtiere with a homemade crust
This week we’re celebrating my (Julie’s) French-Canadian heritage by making mom’s famous tourtiere! This delicious meat pie features ground beef [#11], ground pork [#12], and ground lamb [#13], not to mention the pie crust that includes lard [#14] that we rendered from our own pork fat (no room to discuss how to make lard today, but I’ll give you full details when the apples are ripe and ready for apple pie...oooh September can’t come soon enough!).
Wednesday, July 2, 2014
Now, here’s our top secret recipe for the tourtiere (this one really was passed down from my grandmother and is not in the Joy of Cooking!):
Makes one large deep dish pie (9 inch pie plate) or two smaller shallow dish pies (8 inch pie plate):
1 lb each: ground lamb & ground beef & ground pork
2 medium onions chopped finely
2 garlic cloves chopped finely
1/2 tsp pepper
1/2 tsp salt
1 tsp ground cloves
1 tsp allspice
Place all ingredients into a pot and cover 3/4 with water. Simmer for 1 hour or until meat is fully cooked (be sure to stir the meat around so that it is well mixed). Remove meat mixture from the liquid and place the meat in the unbaked pie crust(s) (you may want to add a few spoonfuls of the liquid so the pie is not too dry) and cover with upper pie crust(s). Bake at 420 F for 10 minutes and then reduce heat to 375 F and bake for 1/2 hour.

Thursday, February 9, 2017
Here’s what I do:
Add 2/3 of a cup of lard and 2 tbsp of butter to 2 cups of white flour (I’ve tried a combo of white and whole wheat flour, but I prefer the light flaky texture of all white flour in a crust...I’ll eat whole grain bread for lunch to appease Health Canada). Sprinkle 1/2 tsp of salt into the mixture.
I use refrigerated butter and frozen lard so I cut them up into small dice-sized chunks and leave the mixture to sit for a few minutes as they soften up a bit. The chunks of butter and lard should still be cold when you begin mixing them with the flour but a little more malleable than when they first come out of the fridge/freezer. With a fork, I mush the chunks of butter and lard into the flour and then do the finer blending by mushing them between my fingers so that the whole mixture is well blended and a little crumbly. Then I add 1/4 cup of cold water to the whole mixture mixing it gently with my hands at first and then when the water is equally incorporated into the whole mixture, kneading it into one solid mass.
The trick here is working with cold ingredients. If they get too warm, it will be one slimy greasy mess, so work reasonably quickly if it is a hot summer day.
I break the blob of dough into two unequal sized pieces and form them into balls. The larger ball will be for the bottom crust and the smaller ball for the top crust. My mom always used a large plastic sheet designed for rolling a crust (they are awesome!), but I found that in a pinch, waxed paper sufficed as a surface to roll a crust on. Give the surface that you are rolling your dough on a light sprinkle of flour and then squish your ball of dough into a flatter shape resembling a tea biscuit. Sprinkle flour on it and then begin rolling lightly in all directions. When the crust is the size of a salad plate and about 1/4 of an inch thick, flip it over, sprinkling more flour above and below the crust. Roll it some more until the diameter is two inches wider than your pie plate.
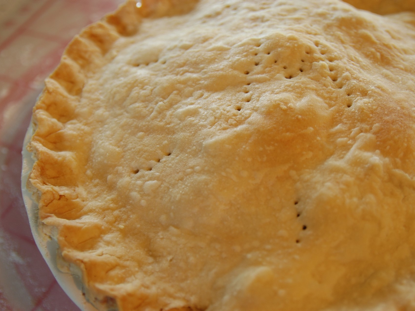
Here’s another trick. To transfer the crust into the pie plate, put the rolling pin across the middle of the crust, flip one half over the rolling pin (this is where the waxed paper or plastic pie crust sheet comes in handy) and lift the crust using the handles of the rolling pin to help place it onto the pie plate. There will probably be some wrinkles and folds, and some slightly floppy edges hanging over the side of the pie plate (hey, I never claimed to be Martha Stewart). Fold over or trim any extra long bits that flop over the edge and pat closed with your fingers any rips or cracks that happened when you transferred the dough to the pie plate. Then add your filling (see the recipe for tourtiere below). Roll out the smaller ball of dough the same way and using the rolling pin, place it across the top of your filled pie plate. Use your fingers to mush together the edges of the top and bottom crusts. To make it pretty, take the index finger of your left hand and your thumb and index finger of your right hand to pinch the crust into a zigzag edging that even Martha Stewart would approve of. Prick the upper crust with a fork to allow some of the steam to escape. I like to make a monogram of the type of pie I make in the middle (A for apple pie, M for meat pie, etc.) and prick 6 fork impressions in a star shape around the monogram. Et voila, you’ve made a crust!

Some say I’m a homemade pie crust snob, scoffing at people in the grocery store who buy all sorts of amazing fresh ingredients for a pie along with a store-bought crust. Really? Why go through the effort of making your own filling when it is ruined by a sub-standard mass-produced crust? That’d be like going through the effort of designing and making a spectacular dress for your prom or wedding and then wearing it with dirty smelly sneakers. Or knitting an extravagant Fair Isle sweater with cheap acrylic yarn (yes, I’m a wool snob too). Okay, enough of the homemade pie crust rant. If you insist on buying your own crust (or if you’ve already mastered the art of pie crust-making) skip over the next few paragraphs and you’ll find the recipe for the tourtiere at the bottom of the page.
To make a good pie crust takes practice, but it is definitely worth it for the soft flaky texture in the end. Over time I’ve modified our family recipe passed down from my grandmother to my mother and then to my sister and I. Well, okay it was really the recipe in the Joy of Cooking, but I’ve added way more detail here.
It might take you a while to figure out the right balance of fats (butter/lard), flour, and water.
Generally, if it is too sticky, add flour (it shouldn’t stick to your rolling pin) and if it is too dry, add a bit of water and/or butter. Don’t give up. A great pie crust is something to be proud of and can be passed on to your children and grandchildren (or you could just write a blog about it and hope that someone out there will actually read it and give it a try).